Key takeaways
- Fan plug: Confirm whether your fans use four-pin PWM, three-pin DC, or a proprietary connector.
- Power source: Choose SATA-powered hardware for more than a few fans or for high-current models.
- Motherboard connection: Check for an available PWM header, internal USB 2.0 header, or both.
- Channel independence: Verify whether ports are individually controlled or merely duplicated from one signal.
- RGB standard: Keep motor control and lighting control separate in your planning. A fan controller may not control its LEDs.
- Software ecosystem: Confirm operating-system support and whether the controller can retain settings without its application running.
- Physical space: Measure the mounting area and cable routes; compact hubs are easier to hide behind the motherboard tray.
The best fan controller for most PCs is a PWM controller with four or more independently manageable channels, SATA power, and software or BIOS compatibility that matches your motherboard; choose a simple hub for low cost, a USB controller for per-fan control, or a specialist board such as Aqua Computer’s QUADRO when temperature-based automation matters most.
Our top picks
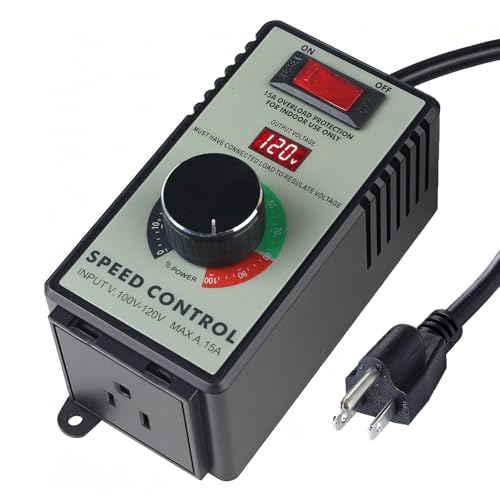
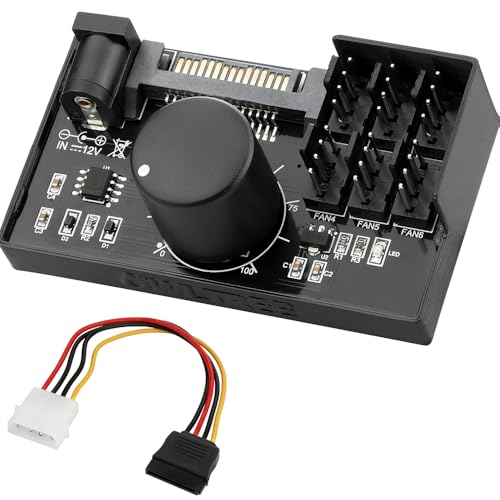


As an Amazon Associate we earn from qualifying purchases at no extra cost to you. Ratings are shown as listed on Amazon.
Quick picks by situation
| Situation | Best controller type | Why it fits | Typical market range |
|---|---|---|---|
| One or two case fans | Motherboard headers or a basic PWM splitter | Lowest cost and no additional software | About $5–$15 |
| Three to six matching fans | Powered PWM hub | One motherboard curve can control several fans | About $10–$25 |
| Mixed fans and separate speed curves | USB fan controller | Multiple channels and software control | About $50–$100 |
| Quiet workstation or water-cooling loop | Multi-channel temperature controller | External sensors and detailed automatic profiles | About $60–$110 |
| RGB-heavy build using one ecosystem | Matching proprietary controller | Combines lighting and fan management | About $50–$120 |
What separates the best fan controllers
Channel count is not the same as fan capacity
A four-channel controller can mean four independently adjustable outputs, or four physical ports that all follow one signal. That distinction matters. A hub such as the ARCTIC Case Fan Hub distributes one motherboard PWM signal to several fans; it is useful for synchronised intake fans but cannot give the front, rear, and radiator fans separate curves.
For independent control, look for the number of actual channels rather than the number of connectors. The Aqua Computer QUADRO provides four PWM outputs and is designed for sensor-driven control. Corsair’s Commander Core XT provides six fan outputs and adds lighting connections, while the NZXT RGB & Fan Controller provides three fan channels and two NZXT RGB channels. These are better choices when different fan groups need different behaviour.
PWM support gives finer low-speed control
Four-pin PWM fans receive a constant 12-volt supply and are controlled by a separate signal. This generally allows steadier low-speed operation than voltage-controlled three-pin fans. A three-pin fan can work on a compatible DC or voltage-control header, but it may stop at a higher minimum speed, restart less smoothly, or offer a narrower adjustment range.
Do not assume that a controller labelled “fan hub” converts three-pin fans into PWM fans. Most hubs simply pass through the motherboard’s control signal. If quiet idle operation is important, use four-pin PWM fans and a controller that explicitly supports PWM output. A controller’s minimum duty-cycle setting is also important: a nominal 20% setting may not keep every fan spinning reliably.
Power delivery prevents overloaded headers
A motherboard header often has a stated limit around 1 ampere, although the exact specification varies by board. A powered hub draws motor power from SATA rather than placing the entire load on one header. This is safer for several fans, especially models with high startup current.
Calculate the load before connecting fans:
Six fans rated at 0.25 A each require 1.5 A at full speed. Connecting them directly to a 1 A header exceeds that header’s nominal rating. A SATA-powered hub can supply the motor current, but the motherboard still supplies the PWM control signal. Leave headroom for startup and avoid combining fans with unusually high current ratings unless the controller specifies the required capacity.
Head-to-head: hub, USB controller, or specialist board?
Powered PWM hub: simplest and cheapest
A powered hub is the right answer when all fans in a group should respond together. The ARCTIC Case Fan Hub is a compact example: it uses SATA power and a motherboard PWM connection, making it suitable for several case fans without consuming multiple headers.
Its limitation is control granularity. Every connected fan generally follows the same curve, and the motherboard may report the speed of only one fan through the hub’s tachometer connection. Use it for a row of front intake fans, not for a system where a radiator and exhaust fan need different curves.
USB controller: more control, more software
The Corsair Commander Core XT is aimed at systems using Corsair’s iCUE ecosystem. It offers six fan outputs, temperature-sensor support, and control through USB software, while the NZXT RGB & Fan Controller targets builds using NZXT’s CAM software and hardware ecosystem. These controllers are convenient when the rest of the build already uses the same brand.
The trade-off is dependence on an internal USB 2.0 header, software, and proprietary RGB connectors. Fan speed control may continue at the last saved or default setting if software is unavailable, but advanced curves and lighting control may not. Check connector compatibility before buying: a standard 5-volt, three-pin addressable RGB plug is not interchangeable with a proprietary lighting plug.
Temperature controller: best for precise automation
Aqua Computer’s QUADRO is a strong option for enthusiasts who want several independent PWM channels, temperature probes, and rule-based control. It can react to coolant or component temperatures rather than simply following a motherboard sensor. That can reduce unnecessary speed changes in a quiet system.
It is less appealing for a basic office PC because installation and configuration are more involved. It also needs suitable sensor placement and time spent tuning hysteresis, which prevents fans from repeatedly accelerating and slowing near a temperature threshold.
Compatibility checklist before you buy
- Fan plug: Confirm whether your fans use four-pin PWM, three-pin DC, or a proprietary connector.
- Power source: Choose SATA-powered hardware for more than a few fans or for high-current models.
- Motherboard connection: Check for an available PWM header, internal USB 2.0 header, or both.
- Channel independence: Verify whether ports are individually controlled or merely duplicated from one signal.
- RGB standard: Keep motor control and lighting control separate in your planning. A fan controller may not control its LEDs.
- Software ecosystem: Confirm operating-system support and whether the controller can retain settings without its application running.
- Physical space: Measure the mounting area and cable routes; compact hubs are easier to hide behind the motherboard tray.
How to set up a quiet fan curve
- Connect the controller’s power cable before attaching the fans. This lets the controller provide motor power independently of the motherboard header.
- Group fans by purpose: front and bottom intake, rear and top exhaust, and radiator fans should normally be separate groups.
- Start with a low idle target, such as 25–35% PWM, if every fan remains reliably spinning.
- Use a gradual ramp rather than an immediate jump. For example, set roughly 35% at 40°C, 50% at 60°C, and 75–100% at 80°C, then adjust for your components and noise tolerance.
- Add a response delay or hysteresis of approximately 3–10 seconds where available. This prevents brief application bursts from causing audible speed changes.
- Test the hottest realistic workload and confirm that no fan stops unexpectedly. A fan that stalls at low duty cycle should receive a higher minimum setting.
When a hub reports only one tachometer signal, do not interpret that reading as proof that every connected fan is spinning. Inspect the fans during setup, and use a controller with per-channel monitoring if failure detection is important.
Ownership realities: what wears out first
Dust buildup is usually a bigger long-term problem than the controller electronics. Dirty fan bearings and restricted filters force higher speeds, increasing noise and reducing cooling efficiency. Clean filters every few weeks in dusty rooms and inspect the fan blades and controller connectors every few months. Use compressed air carefully, holding fan blades still so they do not overspeed.
Mechanical fan bearings and cables are more likely to fail than a solid-state controller. Avoid sharp bends at fan plugs, do not pull cables by their wires, and secure the controller away from areas where it can rub against the case. If a fan repeatedly disappears from monitoring, swap its port with a known-good fan; this separates a failed fan from a failed channel before replacing hardware.
Final buying advice
Choose a powered PWM hub when you only need grouped control. Choose a USB controller when you need independent fan curves and already use its software ecosystem. Choose a multi-channel sensor controller when quiet, temperature-based automation is more important than simplicity. For most new builds, four-pin PWM compatibility, SATA power, at least four real channels, and clear motherboard or software support are more valuable than a high connector count.