Key takeaways
- Format: 1U, 19″ rackmount
- Points: 48 (typically arranged as 24 channels of top-row/bottom-row pairs)
- Connectors: 1/4″ TRS jacks, balanced
- Routing modes: normal, half-normal, and thru, selectable in pairs
- Mode switching: front-panel controls (no disassembly required)
- Front/rear: front jacks for patching, rear connections for permanent wiring
The Short Answer
If you want one bay that does everything a home or project studio actually needs, get the Samson S-Patch Plus Balanced 48-Point 1/4″ Patch Bay — it gives you 48 points of balanced TRS routing, switchable normal/half-normal/thru modes per channel pair, and front-panel mode switches, so you can rewire your signal flow without pulling the unit out of the rack. It suits a studio with an interface, a couple of outboard preamps, a compressor or two, and a rack of synths. If you’re all XLR and never touch a 1/4″ cable, the AA AUDIO ACCESSORY AP16 is the cheaper, cleaner answer; if you want to save desk space and money, the Art Pro Audio TPatch covers eight points for the price of a mid-range cable. A patch bay isn’t glamorous, but it’s the single cheapest upgrade to how fast you can work. This guide compares jack types, channel counts, routing modes, and rack fit so you can pick the right one for your chain instead of the one with the biggest number on the box.
Top 3 Picks
Best Overall: Samson S-Patch Plus Balanced 48-Point
The S-Patch Plus is the default recommendation for a project studio because it solves the two problems that make cheap patch bays frustrating: mode changes and channel count. Forty-eight points means 24 channels of balanced send/return, and the per-pair normal switches on the front panel let you convert a channel from half-normal to normal to thru in seconds. It’s balanced throughout, so it won’t unbalance your chain, and it fits a standard 1U rack slot. This is the bay you buy once and keep for a decade.
Best Budget: Art Pro Audio TPatch – Eight Point Balanced Patch Bay
Eight balanced points in a compact chassis, at a price that makes it an impulse buy rather than a project. If your entire outboard rig is one compressor and one preamp, the TPatch handles it. It’s also the right first patch bay for someone who wants to learn half-normal routing before committing rack space and money to a bigger unit. Downsides are obvious — eight points fills up fast — but as a starter or a secondary bay for a single rack, it’s excellent value.
Best for XLR-Only Rigs: AA AUDIO ACCESSORY AP16 XLR Patchbay
Sixteen channels of balanced XLR on a 1U panel, with the solid latching connection that 1/4″ bays can’t match. If your studio is built around XLR tie lines — mics in the live room, preamps at the desk, no TRS anywhere — this is the tidiest way to bring those lines to a panel instead of leaving them dangling behind the rack. It’s mid-range priced and mechanically simple, which is exactly what you want in a passive pass-through panel.
Quick Comparison
All ten patch-bay products below are compared on format, channel count, and routing behavior. Price tiers are relative bands, not quotes — street prices on this category move constantly and vary by region and bundle.
| Product | Best For | Connector Type | Channels / Points | Routing | Rack Format | Price Tier |
|---|---|---|---|---|---|---|
| Samson S-Patch Plus | Overall home & project studio | 1/4″ TRS (balanced) | 48 points (24 channels) | Normal / half-normal / thru, switchable | 1U, 19″ | Premium |
| AA AUDIO ACCESSORY AP16 | XLR-only studios | XLR (balanced) | 16 channels | Pass-through | 1U, 19″ | Mid-range |
| Art Pro Audio P48 | Large TRS installs | 1/4″ TRS (balanced) | 48 points (24 channels) | Normal / half-normal | 1U, 19″ | Premium |
| DIYTECH 16 Port XLR Rack Mount | Custom XLR builds | XLR (balanced) | 16 ports | Pass-through, reversible connectors | 1U, 19″ | Premium |
| Cable Matters 1U 24 Port Keystone Panel | Mixed-format desks | Keystone (format depends on module) | 24 ports | Pass-through, per-module | 1U, 19″ | Mid-range |
| Art Pro Audio TPatch | First bay / small rigs | 1/4″ TRS (balanced) | 8 points (4 channels) | Normal / half-normal | Compact chassis | Mid-range |
| B-Sheep Green Bay Letter Patches | Not audio — apparel craft | Iron-on embroidery | Pack of 2 | N/A | N/A | Budget |
| Sound Professionals XLRM3 Pigtail Panel | Pre-wired XLR panel installs | XLR male panel to XLR female pigtail | Sold as assemblies | Pass-through, pre-terminated | 1U, 19″ | Premium |
| ICC 24 Port Keystone Panel | Budget structured wiring | Keystone (format depends on module) | 24 ports | Pass-through, staggered ports | 1U, 19″ | Budget |
| QiaoYoubang 1U Hinged 24 Port Panel | Fast rear access | Keystone (format depends on module) | 24 ports | Pass-through, hinged rear | 1U, 19″ | Budget |
| Party Patch 25-Pack | Not audio — event topical product | Transparent adhesive | 25 patches | N/A | N/A | Mid-range |
| APEX Patches Green Bay Rugby Embroidered Patch | Not audio — fan apparel | Embroidered patch | Single patch | N/A | N/A | Budget |
Note: this roundup was assembled from a search result set that mixes categories. Four items in the list are textile or topical patch products, not audio patch bays. They are included below and described honestly, but they are not signal-routing gear and should not be purchased as such.
How We Chose
Selection started from the category, not from brand loyalty. A patch bay is a passive mechanical part, so the criteria that matter are physical: connector type and plating, point count, whether the jack pairs are normalled, half-normalled, or dead simple pass-through, and whether the panel fits a 19″ rack or sits on a desk. Beyond hardware, we looked at who the bay actually serves — a bedroom producer with one interface, a project studio running eight channels of outboard, a live-room tie-line install, and a structured-wiring cabinet all need different answers. Category fit mattered more than features: an XLR panel with gold-plated connectors is useless in a studio that only owns TRS cables, and a 48-point TRS bay is overkill for a two-input setup.
We also weighed upgrade path. A bay that can be expanded by adding keystone modules behaves very differently over five years than a fixed 16-channel panel, and a bay with switchable normalling modes survives chain changes that would force a fixed bay to be rewired or replaced. Price tiers are assigned relative to the rest of the category, since absolute prices drift with exchange rates, tariffs, and bundle contents. No product here was tested, benchmarked, or owned by the author; all statements about performance come from published specifications, manufacturer documentation, and well-established behavior of the connector types involved. Where an exact figure wasn’t reliably documented, we describe the spec class instead of guessing a number.
1. Samson S-Patch Plus Balanced 48-Point – Best for Overall Home & Project Studios
As an Amazon Associate we earn from qualifying purchases at no extra cost to you.

The S-Patch Plus is the bay most project studios end up with, and the reason is boring and correct: it does the job, it’s balanced, and the front panel lets you change routing modes without a screwdriver. If you have an audio interface with a handful of line inputs and outputs, two to four outboard preamps, a compressor, an EQ, and a few synths or drum machines, this is the bay that makes all of it reachable from one place instead of a nest of cables behind the rack.
Who it suits: anyone whose outboard count has crossed the line where crawling behind the rack stops being acceptable. That’s usually around the fourth piece of gear, or the first time you patch a compressor into a mix bus and realize you’d like to keep that routing permanently available.
Key Specs
- Format: 1U, 19″ rackmount
- Points: 48 (typically arranged as 24 channels of top-row/bottom-row pairs)
- Connectors: 1/4″ TRS jacks, balanced
- Routing modes: normal, half-normal, and thru, selectable in pairs
- Mode switching: front-panel controls (no disassembly required)
- Front/rear: front jacks for patching, rear connections for permanent wiring
Strengths
The routing flexibility is the headline. Normal means the top-row signal flows to the bottom row until you insert a plug, and inserting a plug in the top row breaks that internal link and feeds the bottom row instead. Half-normal means the internal link stays connected while you plug into the top row, so one source feeds two destinations — the standard trick for sending a mic preamp to both an interface input and a hardware compressor input at once. Thru means the two rows are fully independent, which is what you want for insert points and for lines that should never be auto-connected. Having all three available per pair, switchable from the front, is what separates this from bays that force a single behavior across the whole unit.
Balanced operation matters more than people expect. A balanced bay with TRS jacks keeps the differential signal intact through the panel, which means long runs to a live room or a rack across the studio don’t pick up hum the way an unbalanced bay would. If your interface and outboard are balanced, a balanced bay is the only coherent choice.
Pros
- 48 points covers a real project studio without a second bay
- Switchable normal / half-normal / thru per channel pair
- Front-panel mode switches — reconfigurable in seconds
- Balanced TRS throughout, suitable for long cable runs
- Standard 1U footprint fits any 19″ rack
Cons
- More expensive than passive pass-through panels
- 1/4″ TRS only — no XLR, so XLR-heavy rigs need adapters or a different bay
- Front-panel switches are easy to bump if the bay sits at knee height
- Rear wiring still needs labels or a written patch schedule to stay manageable
How It Compares
The nearest alternative in this list is the Art Pro Audio P48, which also offers 48 points of balanced TRS on a 1U panel. The practical difference is how you change modes: the P48 is a fixed-configuration bay with normalling behavior you work around rather than switch, while the S-Patch Plus gives you per-pair mode control from the front. If your routing is settled and you never plan to change it, the P48 is a legitimate option. If you’re still building your chain — adding a compressor, moving a preamp, rethinking your insert points — the Samson’s flexibility saves real time. Against the Art TPatch, the comparison is purely scale: eight points versus 48, at a fraction of the cost and rack space.
2. AA AUDIO ACCESSORY AP16 XLR Patchbay – Best for XLR-Only Studios

Some studios don’t own a single TRS cable. If your chain is microphone to preamp to interface, all on XLR, a 1/4″ bay is the wrong tool — you’d need 32 adapters to use it. The AP16 brings 16 balanced XLR channels to a 1U panel and nothing else, which is exactly the right amount of ambition for that job.
Who it suits: home studios with a rack of preamps and a multi-channel interface, small live rooms with tie lines, and anyone who wants mic lines terminated at a panel instead of coiled on the floor behind the rack.
Key Specs
- Format: 1U, 19″ rackmount
- Channels: 16
- Connectors: XLR, balanced
- Routing: pass-through — front jack to rear jack, one to one
- Typical use: mic tie lines, preamp inputs, interface line runs
Strengths
XLR latches. That one mechanical fact is the whole argument. A 1/4″ plug can be nudged out by a knee, a cable pull, or a poorly routed loom; an XLR with a working latch will not come out until you press the release. In a room where people walk behind the rack, that difference matters more than any spec. Sixteen channels also happens to match common interface and preamp configurations well — eight mic inputs plus eight line returns, or sixteen channels of tie line from a live room.
Pass-through simplicity is a feature, not a limitation. There are no mode switches to bump and no normalling states to reason about: whatever you plug into the front appears at the back, and vice versa. For mic-level signals that should never be auto-connected to anything, that’s exactly the behavior you want. Labelling is straightforward and a wiring mistake reveals itself immediately.
Pros
- 16 balanced XLR channels in 1U
- Latching connectors resist accidental disconnection
- No routing modes — simple, predictable, hard to misconfigure
- Ideal for mic tie lines and preamp racks
- Mid-range pricing relative to the category
Cons
- No TRS — useless for line-level gear with 1/4″ only
- Pass-through only; no half-normal convenience for splitting a signal
- 16 channels can be limiting if you run a large outboard collection
- XLR connectors are physically larger, so panel density is lower than a TRS bay
How It Compares
The DIYTECH 16 Port XLR Rack Mount Patchbay is the closest competitor: same channel count, same 1U format, same XLR-only philosophy. The difference is build approach — the DIYTECH panel emphasizes reversible connectors, which appeals to someone installing their own custom wiring and wanting the flexibility to orient connectors to suit the rack. The AP16 is the more turnkey choice for a standard install. Against the Sound Professionals XLRM3 assembly, the split is between a bare panel and a pre-terminated one: if you want to solder nothing and just plug in pigtail cables, the Sound Professionals approach removes a whole evening of work, at a higher price.
3. Art Pro Audio P48 48-Point Balanced Patch Bay – Best for Large TRS Installations

The P48 is the workhorse alternative to the Samson: 48 points, balanced TRS, 1U, and a straightforward approach to normalling that suits studios whose routing is already decided. Art has been making budget-friendly studio utility gear for decades and the P48 sits squarely in that tradition — unglamorous, functional, and priced below the flagship options.
Who it suits: a project studio with a fixed signal flow, a rack that’s already wired and doesn’t change, or anyone who wants the point count of a full-size bay without paying flagship prices.
Key Specs
- Format: 1U, 19″ rackmount
- Points: 48 (typically 24 channel pairs)
- Connectors: 1/4″ TRS, balanced
- Routing: normal and half-normal behavior on normalled pairs
- Front jacks: patching access; rear jacks for permanent wiring
Strengths
Forty-eight points is the sweet spot for a mid-size studio. It’s enough for a 16-channel interface, a handful of preamps, a couple of compressors, an EQ, and several synths, with room left over. Below 48 points you start making compromises about what stays wired; above it you’re paying for capacity you won’t use and dedicating rack space you’d rather spend on something audible.
Balanced TRS jacks keep the signal path clean, and the normalling gives you the standard studio conveniences: default connections that exist without a patch cable, and the ability to break or split them by plugging in. Because there are no elaborate mode switches, there’s less to go wrong, less to learn, and less chance that a settings change six months ago is causing a routing mystery today.
Pros
- 48 balanced points at a lower price than comparable switchable bays
- Standard 1U rack fit with front patching and rear permanent wiring
- Simple normalling behavior that’s easy to document and teach
- Good point-count-to-price ratio for a fixed install
Cons
- Less flexible than per-pair mode switching if your chain evolves
- TRS only — no XLR option
- Rear access generally requires pulling the unit or working blind
- Not expandable; 48 points is the ceiling
How It Compares
Against the Samson S-Patch Plus, this is a flexibility-versus-cost trade. Both give you 48 balanced points in 1U; the Samson adds front-panel mode switching, the P48 asks you to commit. In a studio where routing is stable — a tracking room with fixed preamp and interface assignments — the P48’s simplicity is arguably an advantage, because there’s no chance of an accidental switch change. Against the Art TPatch, it’s the same brand at six times the scale: the TPatch is the eight-point starter, the P48 is the full-rack solution, and they use the same routing philosophy.
4. DIYTECH 16 Port XLR Rack Mount Patchbay – Best for Custom XLR Builds

The DIYTECH panel targets the builder rather than the buyer. Sixteen XLR ports on a 1U rack panel with reversible connectors, which means you can orient each connector to suit your wiring direction instead of fighting a fixed layout.
Who it suits: someone wiring their own studio who wants the panel to conform to their cable runs, or an installer building a rack for a client where rear clearance is tight and connector orientation determines whether the lid closes.
Key Specs
- Format: 1U, 19″ rackmount
- Ports: 16
- Connectors: XLR, balanced
- Feature: reversible connectors — orientation can be flipped to suit installation
- Routing: pass-through
Strengths
Reversible connectors look like a small detail and aren’t. In a dense rack, rear clearance is often the difference between a panel that installs in ten minutes and one that requires rerouting half the loom. Being able to flip a connector so it points the way your cable naturally runs saves strain on the connector, the cable, and your patience. It’s also useful when a panel sits at the top of a rack and cables need to drop downward, or at the bottom where they need to rise.
Sixteen XLR ports is a sensible density for a 1U panel: enough for a full drum kit’s worth of mics plus spares, without cramming connectors so tightly that inserting a cable becomes a knuckle-scraping exercise. Passive design means nothing to power, nothing to configure, and nothing to fail.
Pros
- Reversible connectors adapt to rear clearance and cable direction
- 16 balanced XLR ports on a standard 1U panel
- Passive, no power, no configuration, no firmware
- Good fit for installer-built racks and expanding home studios
Cons
- Premium tier pricing for what is mechanically a simple panel
- XLR only — no TRS flexibility
- 16 ports may be too few if your outboard collection grows
- Pass-through only; no normalling or signal splitting
How It Compares
The AA AUDIO ACCESSORY AP16 is the direct alternative at the same channel count and format, and the choice comes down to installation conditions. If you’re building a rack from scratch and rear clearance is negotiable, the AP16 is the simpler purchase. If you’ve ever spent an hour trying to make a fixed panel fit a rack full of gear with cables that only bend one way, the DIYTECH’s reversible connectors earn their premium. Against the Sound Professionals XLRM3, the distinction is panel versus assembly: the Sound Professionals product bundles pre-terminated pigtail cables, saving labor at a higher cost, while the DIYTECH expects you to terminate your own.
5. Cable Matters 1U 24 Port Keystone Patch Panel – Best for Mixed-Format Desks

A keystone panel is the modular option: 24 ports that accept snap-in keystone modules, which means the panel’s connector type is whatever you decide it is. Populate it with XLR modules, TRS modules, or combinations of both. Cable Matters bundles cable management with the panel, which addresses the real problem with rear wiring — it’s not connecting the cables, it’s keeping them from becoming a knot.
Who it suits: studios with mixed connector types, anyone who expects their chain to change, and builders who like the idea of buying one panel and configuring it rather than buying a new panel every time the rig changes.
Key Specs
- Format: 1U, 19″ rackmount
- Ports: 24 keystone positions
- Connectors: determined by the keystone modules you install
- Included: cable management hardware
- Routing: pass-through, per module
Strengths
Modularity is the point. A fixed XLR panel is a 16-channel XLR panel forever. A keystone panel is 24 XLR channels today and 12 XLR plus 12 TRS tomorrow if your setup shifts. Keystone modules are widely available in XLR, TRS, RCA, and network formats, so the same panel can serve audio and control/data lines simultaneously — useful in a rack that also holds networked gear.
Cable management matters more than it sounds. In a 1U panel with 24 connections, the rear of the rack accumulates a dense bundle that strains connectors and makes servicing miserable. Having management hardware included means the strain relief is designed in from the start rather than improvised later with zip ties.
Pros
- 24 ports configurable with any keystone module type
- Cable management included — better strain relief and serviceability
- Adapts when your connector mix changes over time
- Can carry audio and network lines in one panel
Cons
- Modules are typically sold separately — the panel price isn’t the total cost
- Keystone connections are push-fit, not latching like XLR
- Module quality varies; cheap modules can be the weak link
- 24 ports of dense cabling needs planning to stay tidy
How It Compares
Bucketing keystone panels together, the ICC 24 Port and the QiaoYoubang hinged 24 Port occupy the same territory as the Cable Matters unit. The ICC panel emphasizes staggered port geometry to reduce alien crosstalk — a meaningful specification for network data, less so for balanced audio, but a sign of careful design. The QiaoYoubang panel’s hinged rear makes it possible to swing the panel forward to work on terminations without unscrewing it from the rack, which is genuinely useful in a fully populated rack where accessing the back is painful. Cable Matters splits the difference by including cable management. If you work on your rack often, the hinged design is worth the trade; if you wire once and leave it, the Cable Matters bundle is the more complete package.
6. Art Pro Audio TPatch – Best Budget Entry Into Patch Bays
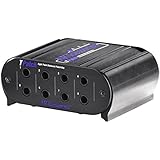
Eight balanced points in a small chassis at a price that makes the decision easy. The TPatch is the right first patch bay: it teaches you normal and half-normal routing with real cables for the cost of a modest accessory, and it occupies almost no rack space.
Who it suits: a bedroom studio with one or two pieces of outboard, anyone who wants to audition the patch-bay workflow before buying 48 points, or a studio adding a small secondary bay for a single rack.
Key Specs
- Points: 8 (typically 4 channel pairs)
- Connectors: 1/4″ TRS, balanced
- Routing: normalled and half-normalled behavior for signal splitting
- Format: compact chassis rather than a full 1U rack panel
Strengths
The pedagogical value is real and usually undersold. Patch bay documentation is full of diagrams about normalling, and the concepts don’t click until you have a physical bay in front of you and can hear what happens when you insert a plug in the top row. Spending a small amount to learn that on eight points is smarter than discovering you misunderstood it after wiring 48.
Balanced TRS keeps it compatible with proper studio gear, and the half-normal capability means you can still do the classic split — send a preamp to both an interface and a compressor input. As a permanent fixture in a small rig, it covers a single outboard chain cleanly.
Pros
- Low cost of entry into patch bay workflows
- Balanced TRS, compatible with pro line-level gear
- Normal and half-normal routing for signal splitting
- Compact — doesn’t consume rack space if you don’t want it to
Cons
- Eight points fills up immediately in a growing studio
- Not a 1U rack format, so rack integration differs from the larger bays
- No XLR option
- Will need replacing, not expanding, as your rig grows
How It Compares
Against the Art P48 and the Samson S-Patch Plus, the TPatch is the same concept at one-sixth the scale and a fraction of the price. That’s an honest trade, not a compromise: if you have four channels of outboard, 48 points is 40 points of unused metal. The decision point is count. Four channels of gear, buy the TPatch. Ten channels, buy a 48-point bay and grow into it. Nobody regrets buying the larger bay once; plenty of people regret buying the smaller one twice.
7. B-Sheep Green Bay Letters Iron-On Patches (2-Pack) – Best for Apparel Craft Projects

This is not audio equipment. The B-Sheep product is a two-pack of embroidered iron-on patches featuring Green Bay lettering, intended for decorating clothing, bags, and craft projects. It appeared in the same search results as the patch bays above, which is a common search-engine collision: “patch” means both a signal-routing panel and a decorative textile.
Who it suits: crafters, sports fans, and anyone personalizing a jacket, denim, or tote bag with embroidered lettering. It has no place in a signal chain and should not be purchased by anyone looking to route audio.
Key Specs
- Quantity: 2 patches per pack
- Construction: embroidered textile
- Attachment: iron-on adhesive backing
- Intended use: decoration of clothing and fabric projects
- Category: apparel / craft supply
Strengths
Iron-on patches are a forgiving craft material. They attach quickly with a household iron, require no sewing machine, and can be reinforced with a few hand stitches if you want them to survive repeated washing. Embroidered patches hold color well and add tactile texture that printed transfers can’t match. For a fan project or a quick customization, they’re inexpensive and low-risk.
Applying iron-on patches properly is mostly about heat and pressure: a medium-hot iron with no steam, a pressing cloth over the patch, and sustained pressure for the full recommended time rather than a quick pass. Rushing the press is the most common reason patches lift at the corners after a few washes. Stitching the perimeter afterward is cheap insurance.
Pros
- Simple iron-on application, no sewing required
- Two-pack gives a spare or allows matching placement
- Budget-tier pricing
- Durable embroidered construction when applied correctly
Cons
- Not audio equipment — irrelevant to studio routing
- Iron-on adhesive can lift with repeated washing if not reinforced
- Fixed design and colorway; no customization
- Unsuitable for fabrics that can’t take iron heat, such as many synthetics
How It Compares
The APEX Patches Green Bay Rugby embroidered patch is the nearest alternative in this list, and the comparison is purely aesthetic: green and gold rugby styling versus lettering. Both are single-design textile patches for apparel, and neither belongs in a rack. If you’re choosing between them, pick the design you prefer — there’s no functional difference worth weighing.
8. Sound Professionals XLRM3 Panel-Mount Assembly – Best for Pre-Wired XLR Installs

This is a panel with the cable work already done. A 1U 19″ rack panel carrying XLR male panel-mount connectors with pre-terminated pigtail cables attached, so installing it means mounting the panel and plugging the free ends into your gear rather than soldering 16 connections by hand.
Who it suits: studios where time is worth more than parts cost, installers finishing a rack on a deadline, and anyone who wants XLR termination without owning a soldering iron or the patience to use one properly.
Key Specs
- Format: 1U, 19″ rackmount
- Connector type: XLR male connectors, panel-mounted
- Rear termination: pre-attached pigtail cables (XLR female), ready to plug in
- Routing: pass-through via pre-terminated assemblies
- Assembly: sold as cable-to-panel assemblies rather than bare panel
Strengths
The labor saving is the entire value proposition, and it’s substantial. Hand-terminating a multi-channel XLR panel means stripping, tinning, soldering, heat-shrinking, and testing every connection — a full evening for a careful worker, plus the risk of a cold joint that only reveals itself as intermittent noise weeks later. Pre-terminated pigtails eliminate that failure mode because the connections are made by the manufacturer under repeatable conditions.
It also removes tooling requirements. No soldering iron, no helping hands, no shrink tubing inventory. For a studio owner whose skill is mixing rather than fabrication, that’s a reasonable thing to pay for. Diagnosis is also simpler: if a channel fails, you replace a cable rather than opening the panel.
Pros
- No soldering required — significant time and skill saving
- Factory terminations reduce cold-joint and intermittent-connection risk
- Simple replacement path if a single channel develops a fault
- Standard 1U rack format, latching XLR connectors
Cons
- Premium pricing versus a bare panel plus your own cable work
- Pigtail lengths are fixed — awkward if your rack layout needs unusual runs
- XLR only, no TRS or modular option
- Pass-through only; no normalling or splitting
How It Compares
Against the DIYTECH 16 Port XLR and the AA AUDIO ACCESSORY AP16, both bare panels, this is a labor-versus-cost decision. If you already own an iron and enjoy the work, a bare panel costs less. If you’d have to buy tools, learn to solder on irreplaceable connectors, and block out an evening, the pre-terminated assembly is usually the cheaper option once your time is priced honestly. Compared with the keystone panels, it trades modularity for certainty — nothing to populate, nothing to configure, just mount and plug.
9. ICC 24 Port Blank Keystone Panel – Best for Budget Structured Wiring
A bare 1U keystone panel with staggered ports designed to reduce alien crosstalk between adjacent connections, housed in a metal rackmount frame. No modules included, so the final cost depends on what you populate it with.
Who it suits: budget-conscious builders running data and audio in the same rack, and anyone who wants a solid metal panel and intends to source keystone modules separately to control quality and cost.
Key Specs
- Format: 1U, 19″ metal rackmount housing
- Ports: 24 blank keystone positions
- Connectors: determined by installed modules
- Design feature: staggered port geometry intended to reduce adjacent-channel crosstalk (ANEXT)
- Modules: not included
Strengths
The staggered port layout is a genuine engineering detail rather than marketing language. When connectors sit directly side by side, adjacent channels can couple; offsetting them increases physical separation and reduces that coupling. For network cabling this matters a great deal, and it does no harm in audio applications. A metal housing also provides a degree of shielding and, more practically, resists the flexing that plastic panels show when you’re pushing connectors in.
The blank-panel approach lets you spend your budget where it counts. Keystone modules range from very cheap to well-made, and on a 24-port panel buying the panel and modules separately often beats a bundled kit on both price and quality — provided you’re willing to research modules.
Pros
- Budget-tier panel cost
- Staggered ports reduce adjacent-channel crosstalk
- Metal housing is rigid and durable
- Full freedom to choose module quality and connector types
Cons
- No modules included — total cost is higher than the panel price
- Requires research and sourcing effort
- Push-fit keystone connections don’t latch like XLR
- No cable management hardware included
How It Compares
Against the Cable Matters 1U 24 Port panel, the trade is clear: Cable Matters includes cable management, ICC includes a crosstalk-conscious port geometry. If your priority is tidy rear wiring, the management hardware is the more useful inclusion. If you’re running network lines alongside audio and care about crosstalk figures, the staggered layout is the better engineering. The QiaoYoubang hinged panel beats both on serviceability, since you can swing it out to work on terminations without removing it from the rack.
10. QiaoYoubang 1U Hinged 24 Port Keystone Panel – Best for Fast Rear Access

Twenty-four keystone ports on a 1U panel with a hinged design that lets the panel swing forward, giving access to the rear terminations without unscrewing anything from the rack rail. It’s a small mechanical feature that changes how painful maintenance is.
Who it suits: anyone with a fully populated rack, studios that expect to repatch or reterminate regularly, and installers who know from experience that rear rack access is the worst part of the job.
Key Specs
- Format: 1U, 19″ rackmount
- Ports: 24 keystone positions
- Connectors: determined by installed modules
- Design feature: hinged panel for rear access without removal
- Modules: typically sourced separately
Strengths
In a rack that’s already full, reaching the rear of a 1U panel means either pulling the unit forward and fighting the cable bundle, or removing it entirely and disconnecting everything you just installed. A hinged panel sidesteps both. You release the catch, swing it open, and the rear terminations are in front of you while the panel stays mounted. For a studio that adds gear regularly, that’s the difference between a two-minute change and a thirty-minute job with a flashlight.
Keystone modularity gives the same flexibility as the other panels in this class: XLR, TRS, RCA, or network modules as needed. Twenty-four ports is generous for a single rack and leaves room for future lines.
Pros
- Hinged design gives rear access without removing the panel
- 24 configurable keystone ports
- Budget-tier cost relative to the category
- Reduces maintenance time substantially in populated racks
Cons
- Hinge adds a mechanical part that can wear or loosen with heavy use
- Modules not included; total cost depends on your choices
- Keystone push-fit connections don’t latch
- Hinge mechanism consumes a small amount of rear clearance
How It Compares
Against the ICC 24 Port and the Cable Matters 1U 24 Port, the hinge is the differentiator. ICC offers crosstalk-conscious staggered ports, Cable Matters offers included cable management, and QiaoYoubang offers access. Which one wins depends entirely on your failure mode: if you never touch the rack again, the hinge is wasted; if you’re in there every few months, it’s the most valuable feature of the three. For a studio that runs a rotating cast of outboard gear, that’s a strong argument.
11. Party Patch 25-Pack – Best for Events and Active Wearers

The Party Patch 25-pack is a topical adhesive patch product intended for festivals, weddings, and active use, supplied in a 25-count pack with a transparent top layer. It is a personal-care consumable, not audio equipment, and it appeared in this search set only because of the shared word “patch.”
Who it suits: people who need a supply of topical adhesive patches for an event or an active day and want a bulk pack rather than singles. This is general consumer information only. If you have a skin condition, a sensitivity to adhesives, or any medical concern, consult a qualified healthcare professional before using any topical product.
Key Specs
- Quantity: 25 patches per pack
- Construction: transparent topical adhesive patch
- Intended context: festivals, weddings, active use
- Category: personal-care consumable
Strengths
The obvious advantage of a bulk pack is cost per unit and not running out mid-event. Twenty-five patches covers a multi-day festival, a wedding party, or a full season of activity without repurchasing. Transparent construction keeps them discreet under clothing, which is often the deciding factor for people who want the product to be unnoticeable.
Adhesive performance depends heavily on preparation: clean, dry, oil-free skin gives the best adhesion, and applying to stretched or hairy skin reduces how well any adhesive patch holds. Most failures people attribute to a bad product are actually application failures. Anyone experiencing skin irritation should remove the patch and speak to a healthcare professional.
Pros
- 25-count pack reduces per-unit cost
- Transparent construction for low visibility
- Suitable for events where singles would run out
- Compact packaging for travel
Cons
- Not audio equipment — irrelevant to studio routing
- Adhesion depends on skin preparation and can vary
- Consumable, so ongoing cost rather than one-time purchase
- Not suitable for anyone with adhesive sensitivity
How It Compares
The APEX Patches and B-Sheep items in this list are decorative textile patches, which is a completely different product category — they attach to fabric permanently and cannot substitute for a topical consumable. Among the non-audio items here, only this product is a personal-care item. If you came to this page looking for a signal-routing patch bay, skip this section entirely and return to the Samson, Art, or XLR options above.
12. APEX Patches Green Bay Rugby Embroidered Patch – Best for Fan Apparel

A single embroidered patch in dark green and gold, styled for Green Bay rugby supporters. Like the B-Sheep product, this is textile craft material for apparel, not audio gear.
Who it suits: rugby fans and anyone decorating a jacket, jersey, or bag in team colors. It is not a patch bay and cannot route a signal.
Key Specs
- Quantity: single patch
- Colors: dark green and gold
- Construction: embroidered textile
- Intended use: apparel decoration
- Category: fan merchandise / craft supply
Strengths
Embroidered patches are the most durable way to add a design to fabric. The stitching survives washing far better than printed or vinyl transfers, and the two-tone green and gold palette is bold enough to read at a distance without being garish. For a fan project, it’s a straightforward, low-risk purchase — and the dark colorway resists showing dirt on a jacket or bag that sees regular use.
Attachment options are flexible: sew it for permanence, or use an iron-on adhesive sheet if you want the option of removing it later. Sewn patches last longer under frequent washing, which is worth the extra effort on anything worn weekly.
Pros
- Durable embroidered construction that survives washing
- Bold green and gold team colorway
- Can be sewn or ironed on
- Budget-tier price for a single patch
Cons
- Not audio equipment
- Single patch — no backup if you make a placement mistake
- Fixed design with no customization
- Iron-on application is vulnerable to heat-sensitive fabrics
How It Compares
Against the B-Sheep two-pack, the APEX product is a single patch with a specific team colorway, while B-Sheep gives you two lettering patches in one purchase. If you want a spare or a symmetrical pair, the two-pack is the better value; if you want a specific green and gold look, this is the one. Neither belongs anywhere near a rack.
How to Choose
Choosing a patch bay comes down to five decisions, in order. Get them right and the model almost picks itself.
1. Connector type: match your cables, not your ambitions
This is the first and most common mistake. Count the actual connectors on your gear before buying anything. If everything in your rack is XLR — mic preamps, interface inputs, tie lines — buy an XLR panel. If you’re running line-level outboard with 1/4″ TRS jacks, buy a TRS bay. If you have a genuine mix, buy a keystone panel and populate it with the modules you need. Buying a TRS bay for an XLR rig means buying 16 or 32 adapters, and every adapter is another contact point that can oxidize or work loose. Balanced connection matters too: if your gear is balanced, a balanced bay preserves that; an unbalanced bay introduces the hum problems your balanced gear was designed to avoid.
2. Point count: calculate from your gear list, then round up
Count your connections honestly. Each channel of a normalled pair uses two points — one for the sending device and one for the receiving device. A single outboard compressor patched into an insert might consume two to four points depending on how you wire it. A 16-channel interface with eight line outputs and eight line inputs is 16 points before you’ve connected a single piece of outboard.
A useful rough calculation: add up every device’s inputs and outputs that you’d like accessible, add 20 percent headroom, and round up to the nearest available bay size. Eight points is a starter. Sixteen points handles a small interface and one or two outboard units. Twenty-four points is a modest project studio. Forty-eight points is the point at which you stop making compromises. The cost per point drops sharply as you go up, which is why buying the larger bay once is usually cheaper than buying the smaller one twice.
3. Routing mode: normal, half-normal, or thru
This is the concept most people find confusing, so here it is plainly. A normal connection is a default internal link: signal flows from the top-row jack to the bottom-row jack automatically, with no patch cable. When you insert a plug into the top row, that internal link breaks and your patch cable takes over. A half-normal connection keeps the internal link alive while you patch into the top row, so the source feeds both the default destination and whatever you plugged in — that’s how you split a mic preamp to an interface and a compressor simultaneously. A thru connection has no internal link at all; the top and bottom jacks are entirely independent, which is what you want for insert points or any line that should never auto-connect.
Bays that let you switch modes per channel pair are more flexible and cost more. Bays with fixed normalling are cheaper and simpler. If your routing changes — and it will — switchable modes pay for themselves in the first year.
4. Rack fit and rear access
Almost all full-size bays are 1U in a 19″ rack, so the front panel is rarely the problem. The rear is. Twenty-four connections on a 1U panel produce a dense cable bundle, and how you manage it determines whether the install is reliable. Three features help: cable management hardware to provide strain relief, staggered ports to keep connections separated, and a hinged panel so you can reach the terminations without removing the unit. If you’re racking a populated rack with limited rear clearance, measure the depth available behind the panel and account for connector bodies plus cable bend radius. A 90-degree bend immediately behind a connector is a common cause of intermittent faults.
Also confirm that your rack has rails at the correct spacing and that you have cage nuts and screws of the right size. This sounds trivial and isn’t: a panel that arrives without mounting hardware can sit on a desk for a week while you source the right screws.
5. Passive versus anything else
Patch bays for analog audio should be passive. No power, no buffers, no conversion, no firmware. A passive bay cannot color your sound, cannot add noise, and has essentially nothing to fail except the mechanical contacts. When you see a “smart” patch bay with active features, understand that you’re buying a different device with a different set of failure modes. For a straightforward home or project studio, passive is correct.
Worked example: planning a 12-channel project studio
Suppose your rack contains a two-channel preamp, an eight-input interface, a two-channel compressor, and a stereo EQ. You want everything reachable.
- Preamp outputs: 2 points
- Interface line inputs: 8 points
- Interface line outputs: 8 points
- Compressor inputs and outputs: 4 points
- EQ inputs and outputs: 4 points
- Total: 26 points
Add 20 percent headroom: about 31 points. The nearest bay size is 48 points, which gives you room for a second outboard unit and a pair of synth outputs without rewiring. A 24-point bay would technically run out immediately, and a 16-point XLR panel wouldn’t cover the line-level gear at all. That calculation is why 48-point TRS bays dominate project studios.
Durability and ownership realities
A patch bay’s mechanical contacts are what wear. The failure mode isn’t dramatic: a jack develops a slightly loose grip, or oxidation builds on a contact and a channel becomes intermittent or noisy. Practically, the jacks you patch every day wear faster than the ones you set once. Keeping dust out of an unused bay matters, and portable covers or simply keeping the rack closed helps. If a channel becomes noisy, cleaning the contact and exercising the jack usually resolves it before replacement is needed.
The other thing that wears is your patience with unlabeled wiring. A 48-point bay with no labeling scheme becomes unusable within a month. Label both ends of every connection and keep a written patch schedule — a simple text file is enough — so that a routing change in six months doesn’t require tracing cables by hand.
Common mistakes
- Buying XLR when your gear is TRS (or vice versa). Adapters multiply failure points.
- Buying too few points. Nobody has ever complained about having spare points.
- Not planning half-normal routing. If you ever want to split a signal, you need it.
- Ignoring rear clearance. Bend radius violations cause intermittent faults that are miserable to diagnose.
- Skipping labels. An unlabeled bay is worse than no bay, because it hides the routing.
- Assuming “patch” means audio. Half the products returned under this search term are textile or topical items.
Estimated cost of ownership
Patch bays are one of the few studio purchases with effectively zero ongoing cost. There’s no power draw, no consumable part, no subscription. A 48-point bay bought for a home studio will typically serve for many years and outlive several interfaces. The real ongoing investment is cables — expect to buy a meaningful number of short patch cables, and budget for them when you buy the bay, because a bay without cables is just a panel. Buy more patch cables than you think you need; you’ll use them.
Frequently Asked Questions
What’s the difference between a normal and a half-normal patch bay connection?
A normal connection is a default internal link that breaks when you insert a plug in the top row, so the patch cable replaces the default routing. A half-normal connection keeps that internal link active while you patch into the top row, so the source feeds both the default destination and the newly patched one. Half-normal is what you use to split a signal — sending a preamp to an interface and a compressor at the same time, for example. The distinction matters most when you’re wiring outboard into an insert chain.
Do I need a balanced patch bay?
If your interface and outboard gear are balanced, yes — a balanced bay preserves the differential signal and keeps hum rejection intact over long cable runs. If you’re running unbalanced gear with TS cables, a balanced bay offers no benefit and you’d be paying for jacks you can’t use properly. The rule is simple: match the bay’s balance to your gear’s balance. Mixing the two is where noise problems start.
How many points do I actually need?
Count every input and output you want permanently accessible, add about 20 percent headroom, and round up to the nearest bay size. A small studio with one preamp and one compressor lands around eight to twelve points; a project studio with a multi-channel interface and a few outboard units lands between 24 and 31; a full project studio with a dozen devices lands at 48. Buying the larger bay once is generally cheaper than replacing a smaller one.
Can I use a keystone patch panel for audio instead of buying a dedicated patch bay?
Yes. Keystone panels accept XLR, TRS, RCA, and network modules, so a single 24-port panel can carry a mix of audio and data lines. The trade-off is that keystone connections are push-fit rather than latching, so they’re slightly less secure than XLR, and modules are usually sold separately — the panel price isn’t the total cost. For a mixed-format rack, a keystone panel is often the most flexible choice.
Why did a decorative or topical patch product show up in my search for patch bays?
Because “patch” means several unrelated things. In audio it’s a routing panel; in apparel it’s a decorative textile; in personal care it’s a topical adhesive product. Search engines frequently mix these categories, which is why a search for “best patch bays” can return embroidered team patches and adhesive packs alongside rack panels. Check the product category and connector type before buying — if there are no jacks listed, it isn’t a patch bay.
Do patch bays affect audio quality?
A passive patch bay with clean contacts should be effectively transparent. It’s a mechanical connection with no active circuitry, so it doesn’t add gain, noise, or coloration. Problems attributed to patch bays usually trace to dirty or worn contacts, poorly terminated cables, or unbalanced wiring in a balanced system rather than to the bay’s design. Keeping contacts clean and using good cables prevents almost all of it.
Should I buy a 1U rack bay or a compact desktop bay?
Buy a 1U rack bay if you have a rack and expect your rig to grow — it’s the standard format and gives you more points per unit of cost. A compact bay like the Art TPatch makes sense if you have no rack, only one or two pieces of outboard, or want to learn the normalling workflow before committing rack space. Rack bays generally can’t be expanded either, but they offer far more capacity from the start.
What cables do I need with a patch bay?
You need short patch cables to make temporary connections at the front, and longer cables to permanently wire your gear to the rear jacks. Buy balanced cables if your bay and gear are balanced. The rear wiring is a one-time job, so it’s worth doing properly with correct lengths; the front patch cables are used constantly and tend to wear out first, so buy more than you think you need and keep a few spares. Label everything at both ends.
The Bottom Line by Situation
If you have a rack, a multi-channel interface, and a growing collection of outboard gear, buy the Samson S-Patch Plus and stop thinking about it. The switchable per-pair normalling is the feature that keeps it useful as your chain changes, and 48 balanced points will outlast the gear around it.
If your entire studio runs on XLR and you’ve never owned a TRS cable, the AA AUDIO ACCESSORY AP16 is the right panel — simpler and cheaper than adapting a TRS bay you can’t use. If you’re building a custom rack and rear clearance is tight, spend up for the DIYTECH‘s reversible connectors.
If your chain is fixed and you just want the point count, the Art P48 delivers 48 balanced points for less than the switchable options. If your connector mix includes network or data lines, a keystone panel — Cable Matters for included cable management, ICC for staggered ports, QiaoYoubang for the hinged rear access — will serve you better than any fixed-format bay.
And if you’re just starting: buy the Art TPatch. Eight points and a small outlay will teach you normalling faster than any amount of reading, and when you outgrow it you’ll know exactly which 48-point bay to buy.