Key takeaways
- Paper and cardstock: All four craft-machine formats handle these materials when the correct folder or die sandwich is used.
- Vellum: Can emboss attractively but may tear around intricate designs. Use lower pressure and a simple pattern.
- Metallic or glitter cardstock: Usually works, although laminated surfaces can show cracking at deep folds.
- Felt and thin foam: Some dies cut these materials, but an embossing folder is not automatically suitable for them.
- Thin leather: Compatibility varies by die and thickness. Test scraps and expect more wear on cutting plates.
- Plastic label tape: Use only in a label embosser designed for that tape width. Feeding it through a paper embossing machine can damage the tape and rollers.
Best Embossing Machines for Crafts and Labels
The best embossing machine depends on whether you need occasional paper texture, repeated card-making, large-format projects, or raised adhesive labels: choose a manual roller machine for low-cost versatility, an electric die-cutting machine for speed and consistent pressure, and a dedicated label embosser for portable name strips.
Quick recommendations by situation
| Situation | Best fit | Why | Main compromise |
|---|---|---|---|
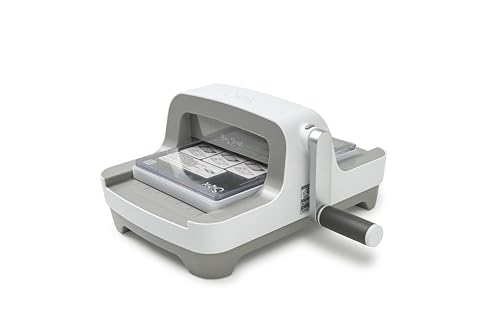
| First machine, occasional crafts | Sizzix Big Shot | Manual operation, broad die availability, no motor or power adapter | Requires hand-cranking and has a smaller working width than A4 machines |
| Frequent card-making in a small workspace | Spellbinders Platinum 6 | Compact manual format with strong compatibility across standard die systems | Its approximately 6-inch opening limits wider layouts |
| Many repeated pieces or thicker projects | Gemini Junior or Gemini II | Electric feeding reduces repetitive cranking and supports larger die formats, depending on model | Higher purchase cost, motor noise, and dependence on electricity |
| Simple raised names and short labels | DYMO Organizer Xpress or another manual embossing label maker | Portable, inexpensive, and purpose-built for plastic embossing tape | Not suitable for decorative paper embossing or large graphics |
| Travel, classroom, or craft fairs | Compact manual label embosser | Usually weighs well under 1 lb and needs no mains power | Limited character set, tape width, and impression depth |
Manual versus electric embossing machines
Manual roller machines
Manual machines use a crank to push a sandwich of cutting plates, paper, embossing folder, or die through rollers. The Sizzix Big Shot and Spellbinders Platinum 6 are representative choices. Their main advantage is control: you can stop, reverse, or adjust the sandwich without relying on a motor’s automatic feed.
Our top picks



As an Amazon Associate we earn from qualifying purchases at no extra cost to you. Ratings are shown as listed on Amazon.
A manual machine is usually the better value when you make fewer than roughly 20 to 30 impressions in a session. It has no motor to replace, consumes no electricity, and remains usable for many years if the rollers, crank, and plates are kept clean. The trade-off is physical effort. Large batches of identical invitations can make the crank tiring, particularly when using a stiff embossing folder or dense cardstock.
Electric machines
Electric models such as the Gemini Junior and Gemini II feed the material at a consistent speed. This is useful for repeated shapes, wedding stationery, classroom preparation, and anyone who finds hand-cranking inconvenient. The major benefit is not necessarily deeper embossing; it is faster, more repeatable feeding with less effort.
Electric pressure is still limited by the manufacturer’s approved platform and accessory combination. Adding extra shims to force a deeper impression can damage the rollers, warp plates, or split paper. When depth matters, select a compatible embossing folder and adjust the material rather than overloading the machine.
Head-to-head specifications
| Machine or type | Operation | Approximate working width | Typical materials | Portability | Accessory cost reality |
|---|---|---|---|---|---|
| Sizzix Big Shot | Manual crank | 6 inches / about 15.2 cm | Cardstock, paper, felt, thin leather, some craft foam with suitable dies | About 7 lb; movable but not pocket-sized | Replacement cutting pads and specialty dies add to long-term cost |
| Spellbinders Platinum 6 | Manual crank | 6 inches / about 15.2 cm | Paper, cardstock, embossing folders, compatible thin dies | Compact desktop format | Plates are consumables; branded and third-party dies vary widely in price |
| Gemini Junior | Electric roller | Approximately 6 inches / 15 cm | Paper, cardstock, thin metal dies, embossing folders | Desktop use; requires a power supply | Cutting plates and magnetic or specialty accessories cost more than basic folders |
| Gemini II | Electric roller | Approximately 9 inches / 22.9 cm | Paper, cardstock, thin dies, embossing folders, selected thicker materials | Less convenient to transport because of its larger platform | Large-format plates are more expensive to replace |
| Manual plastic label embosser | Hand squeeze or dial mechanism | Usually 3/8-inch tape; some models support 1/2-inch tape | Embossing label tape only | Usually under 1 lb | Replacement tape is the continuing expense; character wheels may be model-specific |
These figures are useful for choosing a format, not for predicting identical results. Actual embossing depth depends on paper density, folder design, roller calibration, and the platform instructions. Craft machines generally produce a visible raised or recessed pattern rather than a manufacturer-rated depth in millimetres.
Which machine gives the deepest embossing?
For paper, depth is usually determined more by the embossing folder and substrate than by choosing manual over electric. A detailed folder on 250 to 300 gsm cardstock can create a stronger pattern than a shallow folder on 160 gsm paper. Heavier cardstock supports a crisp ridge, but very thick stock can crack at folds.
Use a test strip before committing to a finished project. If the design is weak, lightly misting the paper can make some fibers more pliable, but too much moisture causes fuzzy edges and warped sheets. A clean embossing mat or manufacturer-approved adapter can also improve results. Do not insert unapproved shims simply to increase pressure.
For plastic labels, manual label embossers create a narrow, permanent-looking raised character by deforming the tape. They are excellent for storage boxes, cables, school supplies, and workshop bins, but the characters are small and the design options are limited. They cannot replace a craft machine for invitations, borders, or large logos.
Material compatibility and project size
- Paper and cardstock: All four craft-machine formats handle these materials when the correct folder or die sandwich is used.
- Vellum: Can emboss attractively but may tear around intricate designs. Use lower pressure and a simple pattern.
- Metallic or glitter cardstock: Usually works, although laminated surfaces can show cracking at deep folds.
- Felt and thin foam: Some dies cut these materials, but an embossing folder is not automatically suitable for them.
- Thin leather: Compatibility varies by die and thickness. Test scraps and expect more wear on cutting plates.
- Plastic label tape: Use only in a label embosser designed for that tape width. Feeding it through a paper embossing machine can damage the tape and rollers.
A 6-inch machine is enough for most greeting cards, scrapbook panels, tags, and small decorations. Choose an approximately 9-inch machine when you routinely emboss A4 or Letter-sized sheets, wide card fronts, banners, or several pieces side by side. A wider opening can also reduce waste, but it takes more storage space and makes replacement plates costlier.
Ownership costs: the machine is only the beginning
Consider a manual machine priced in the general market range of $70 to $150, plus about $20 to $40 for replacement cutting plates over time. If you use it 100 times, the machine and plate cost might total $110 to $190, or approximately $1.10 to $1.90 per use before dies and paper.
An electric machine commonly falls in the broad $150 to $350 range, with larger formats and bundles costing more. If a $250 machine and $50 of replacement plates produce 250 sessions, the equipment cost is about $1.20 per use. That can be economical for frequent users, but not for someone making only ten projects a year. Electric models also introduce a less visible ownership issue: a failed motor, switch, or power adapter can make repair less practical than replacing a manual crank component.
Embossing folders are often cheaper than intricate metal dies, while specialty dies, magnetic sheets, adapters, and branded plate sets can quickly exceed the original machine cost. Before buying, check whether the machine accepts the accessories you already own and whether replacement plates are sold separately.
Setup and maintenance for cleaner impressions
- Measure the material. Keep the sheet within the folder and platform limits. Oversized paper can catch on the rollers.
- Build the approved sandwich. Follow the machine’s platform diagram instead of copying settings from another model.
- Run a scrap test. Test the same paper weight and folder orientation as the final project.
- Feed evenly. Keep the platform square and avoid pulling the material through by hand.
- Remove the sheet carefully. Flex the folder gently rather than forcing a corner out of a deep pattern.
- Clean after use. Brush away paper fibers, wipe smooth plates with a dry cloth, and store plates flat when possible.
The components that wear first are normally cutting plates, embossing mats, folders, and crank or feed mechanisms. Scratched plates can transfer marks to cardstock; warped plates can cause uneven pressure. Replace them when impressions become inconsistent rather than continually adding shims. Keep manual machines on a stable surface, and allow electric machines to cool during long batches if the instructions recommend pauses.
Final buying advice
Choose the Sizzix Big Shot or Spellbinders Platinum 6 if versatility, low operating cost, and easy storage matter most. Choose the Gemini Junior for repeated small-format work where hand-cranking is the bottleneck, or the Gemini II when your projects regularly exceed a 6-inch width. Choose a dedicated manual label embosser only when your goal is short raised text on plastic tape.
The most reliable purchase is the one whose opening matches your largest project and whose replacement plates, folders, tape, and dies you can afford locally over several years. A cheaper machine with readily available consumables is often a better long-term choice than a powerful model whose proprietary accessories are difficult or expensive to replace.